We moved into a new house a little over a year ago and have been slowly making the house work for us. Its been fascinating and frustrating to acclimate to new surroundings, new processes, and new spaces.
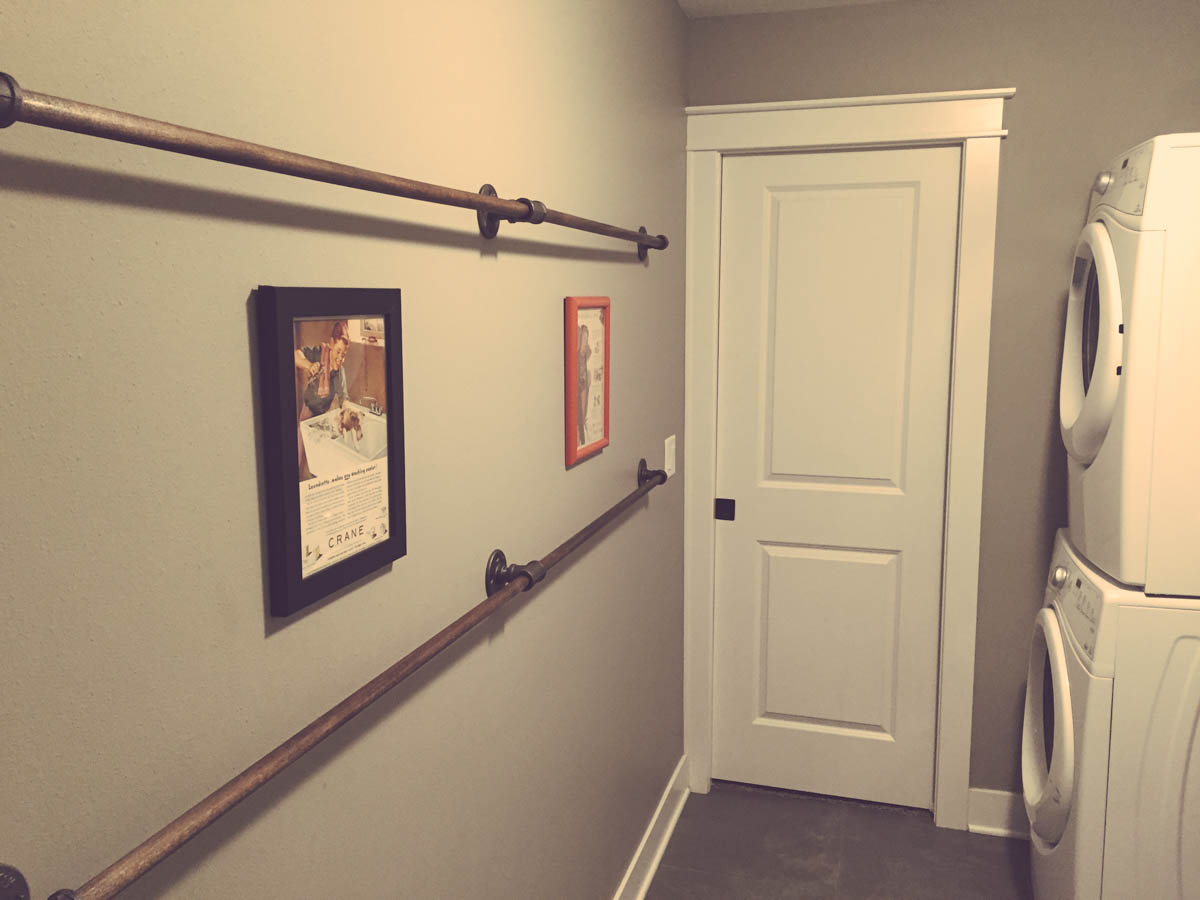
One of the things we’ve been trying to get used to is our laundry/mud room. We really prefer to hang our laundry and have it air-dry rather than use the actual electric dryer. Not only does it save money on energy and supplies, but clothes don’t shrink and there is less wear and tear.
Space however is an issue. We have two fairly large wooden drying racks that take up the majority of the space in the room. That wouldn’t be too much of an issue but the room is also used as a hallway from our closet and it is the only connection to the garage so we need to keep the space clean.
I’ve racked my brain the past year to come up with a solution and have had some crazy ideas including one that would have wooden poles come out of the walls and flip down from the ceiling.
But sometimes the most elegant and workable solutions are also the simplest.
This was such a ridiculously easy build I really can’t believe I didn’t come up with it earlier.
Supplies
The quantities below made three racks about 8′ long. The links are to Menards (a midwest chain) and the exact products I used.
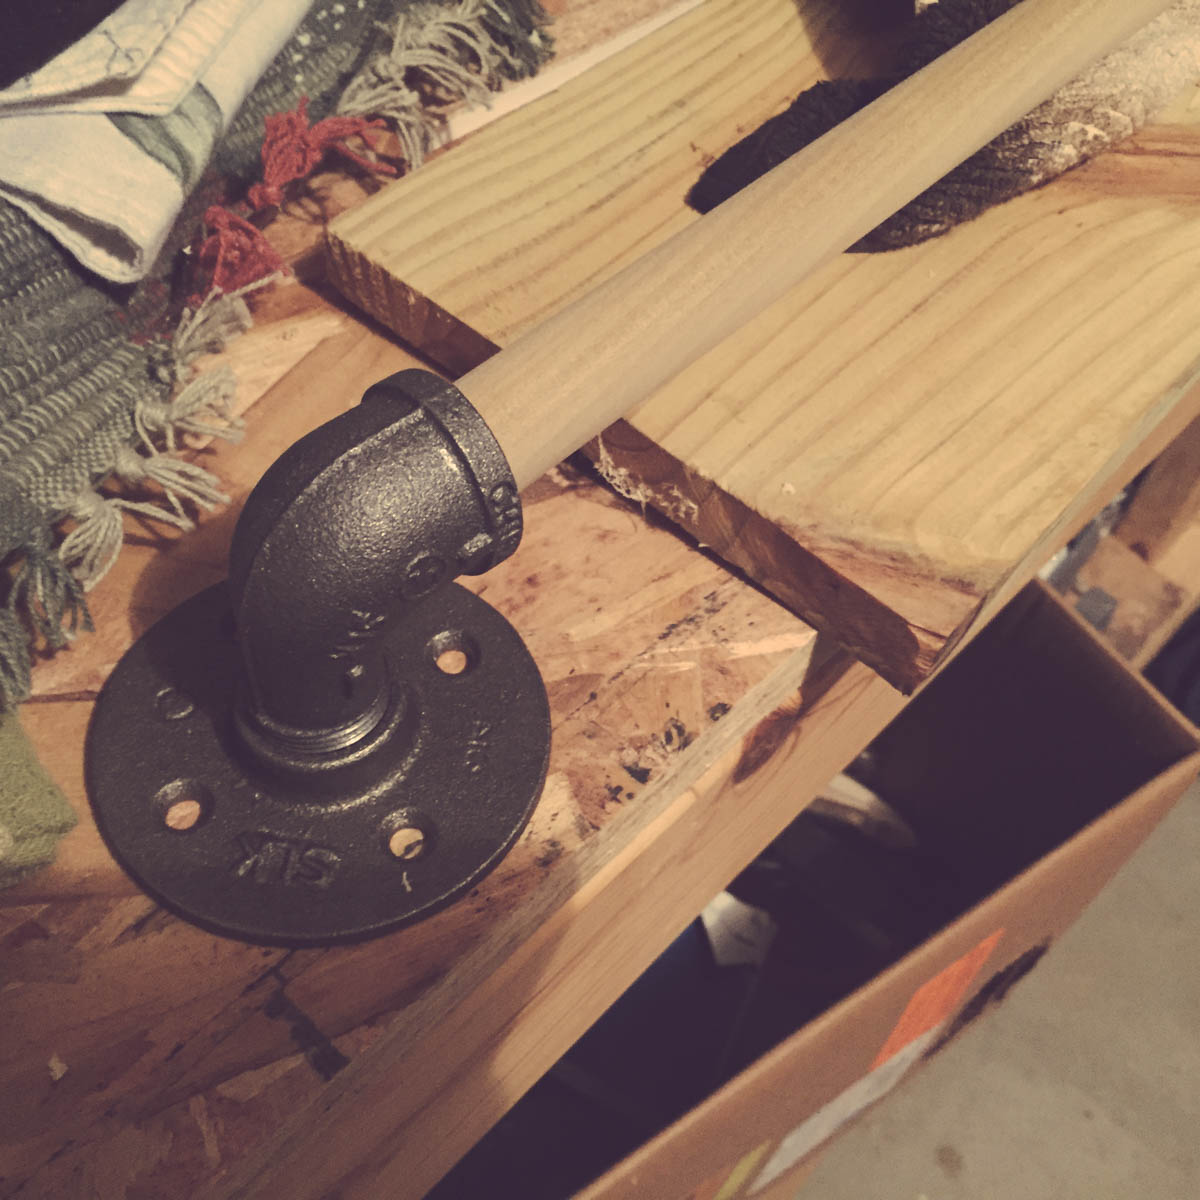
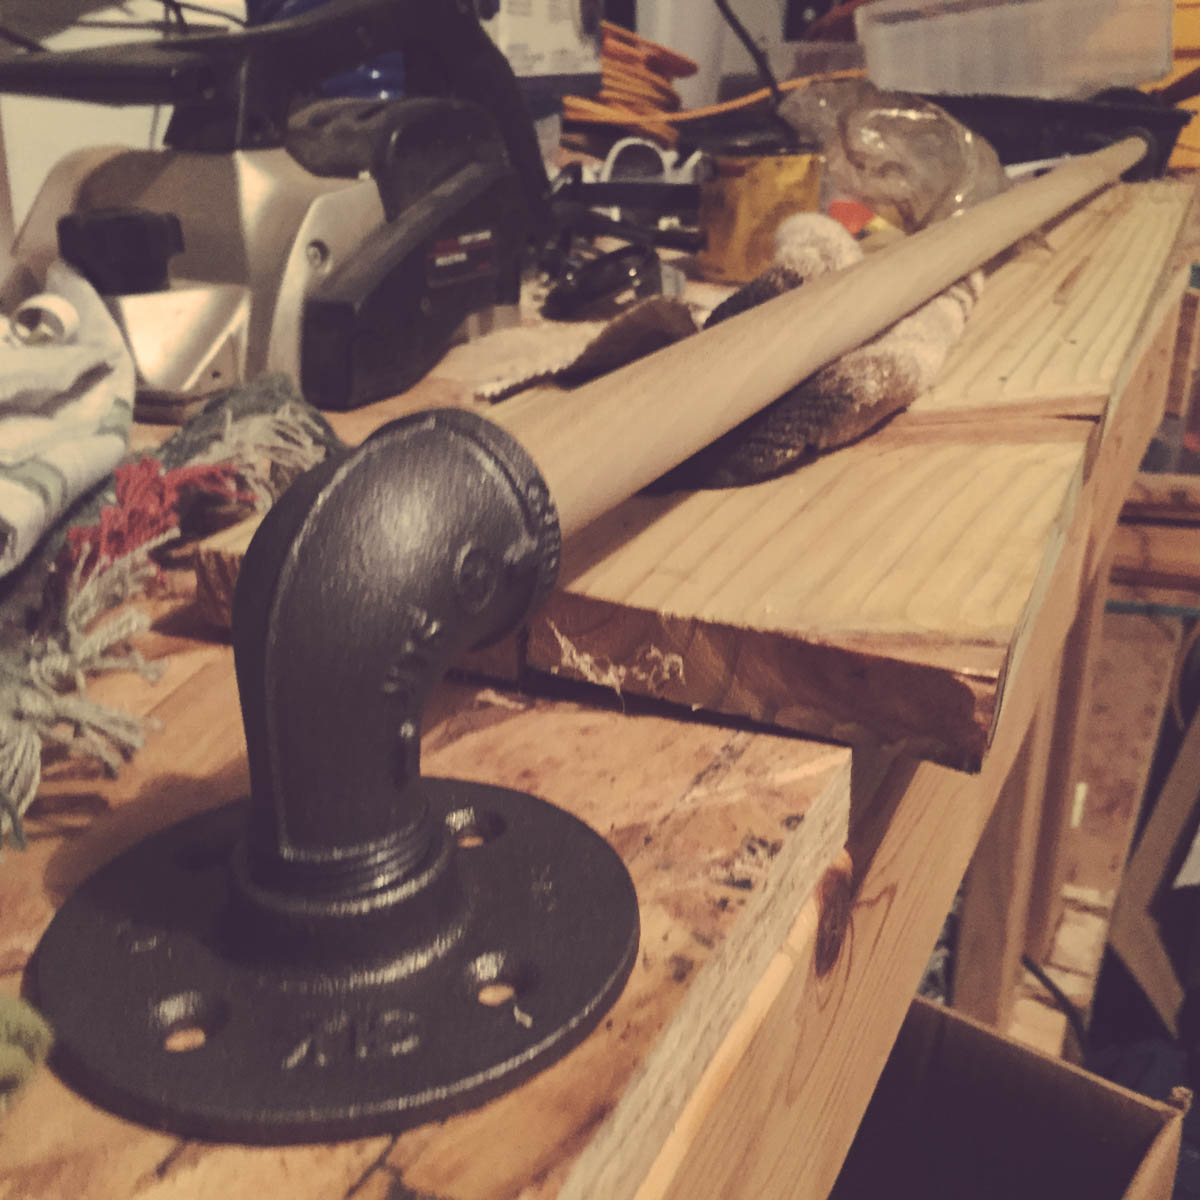
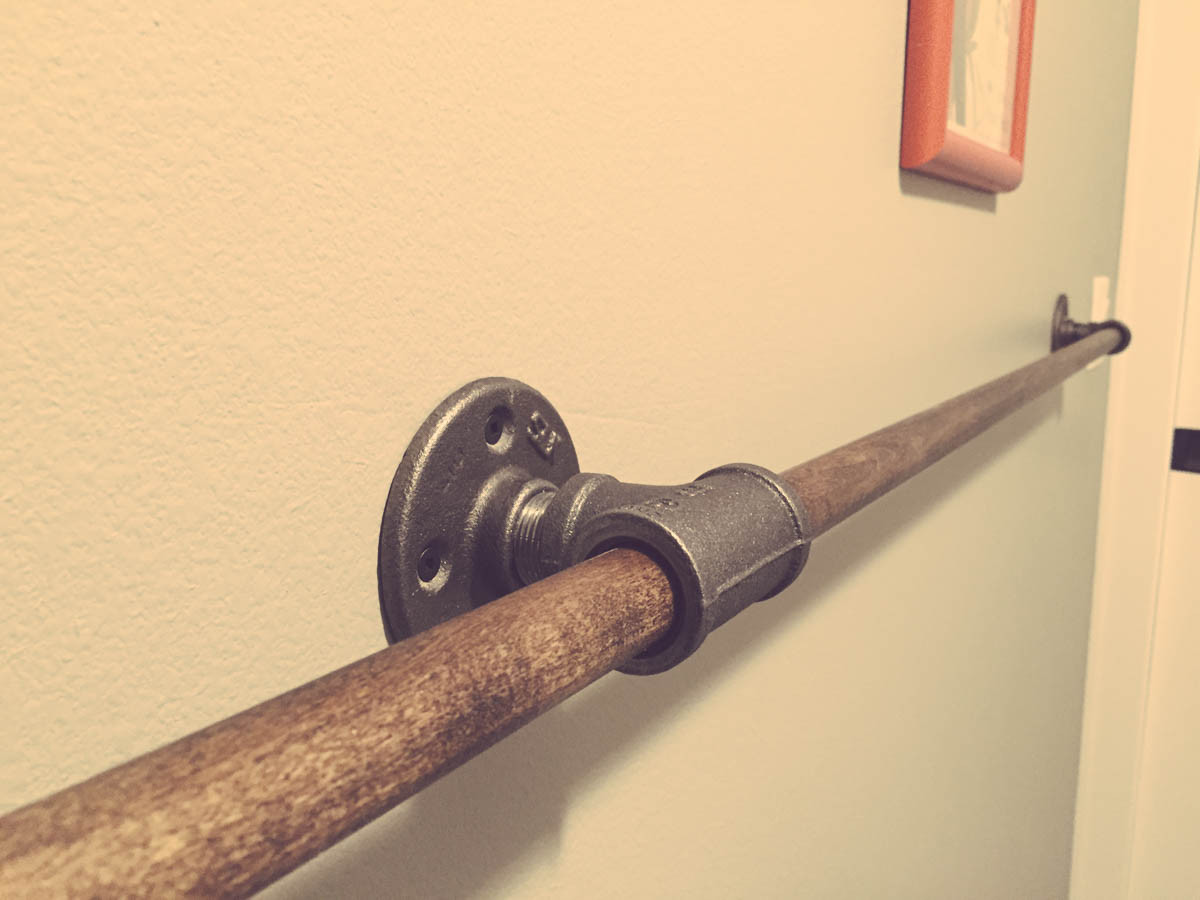
- 3/4″ Black Floor Flange (9) – $4.67/each
- 3/4″ Black 90 degree Street Elbow (6) – $1.59/each
- 3/4″ Black Tee (3) – $1.46/each
- 5/8″ x 48″ Poplar Dowel (6) – $1.49/each
Installation
I wasn’t sure how long the dowels would need to be until I had the flanges in place so the first task was to figure out placement.
I needed to strike a balance of the racks looking nice on the wall while putting as many flanges as possible in studs. So I found studs on either end and of the wall and decided that is how long the racks would be.
You’re particular setup will determine how long or short your want the racks to be.
I screwed the first flange into the stud behind the wall on the right end. I then used a laser level to make sure I was at the correct height on the left end and screwed in the other flange.
I then measured to find the half-way point between the two flanges and using heavy duty drywall anchors screwed in the middle flange.
Screw in the street corner elbows on both ends and the tee in the middle and you can measure to find how long you need to cut your dowels. I used two dowels per rack. It was easiest to install two short rather than one long.
Finishing
Once I had the dowels cut, I sanded and stained them. I also found that using the flanges and elbows was a pretty good way to hold the dowel while staining and drying.
Total Cost of the project was about $65.
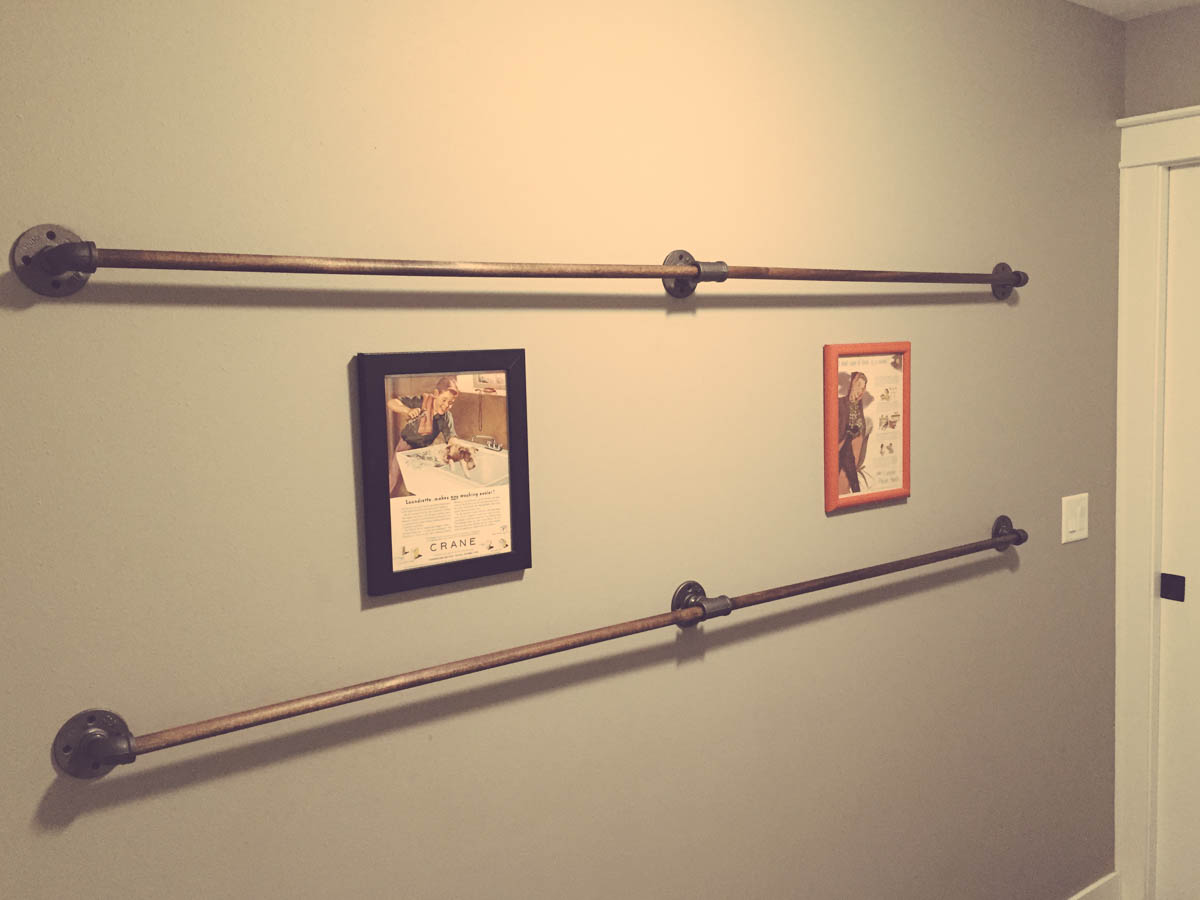
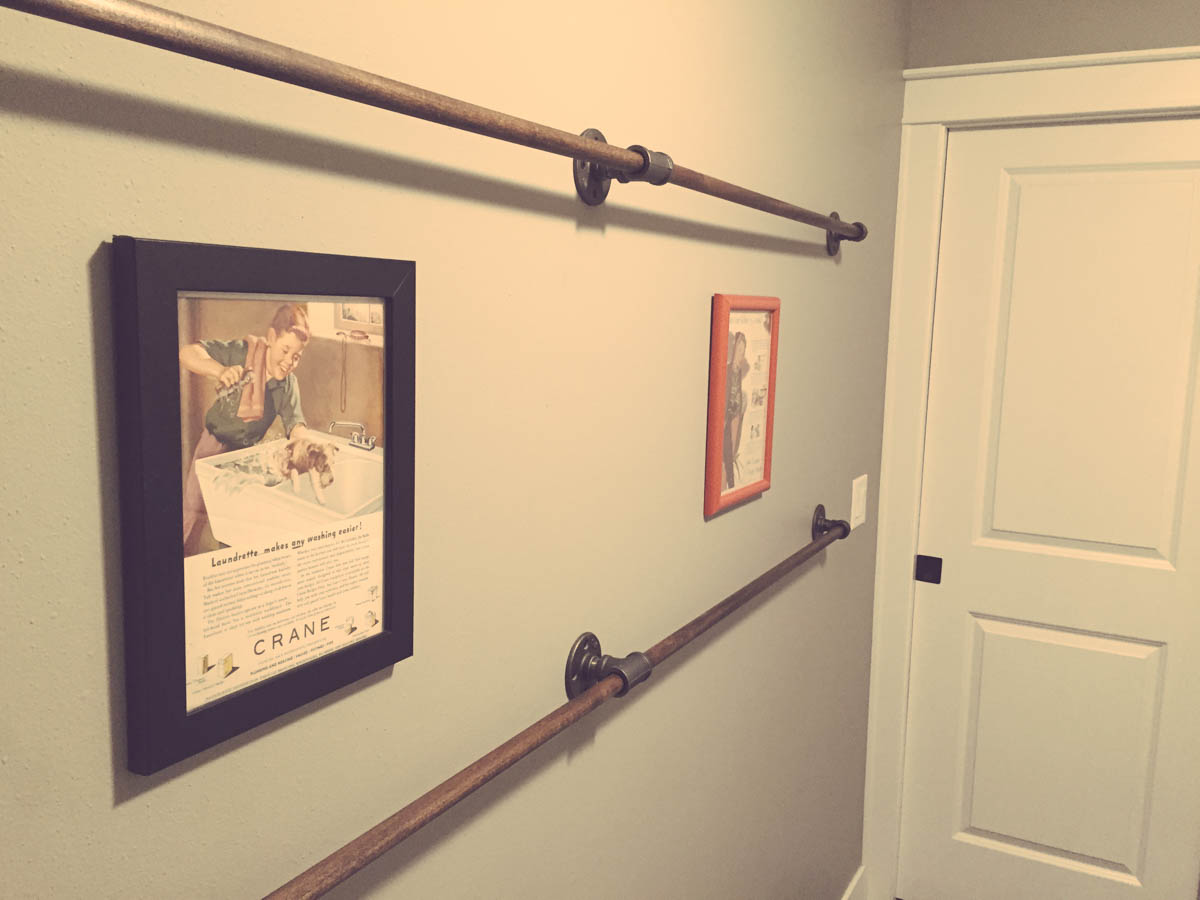
They’ve worked great, look good and have re-gained some much needed space in our laundry room.
These photos below (click to enlarge) only show two racks but I did install a third later on below.
I love this idea and am going to use it in my newly constructed home. We are beginning to frame next week and I’m going to request extra reinforcements in this wall so all flanges can be put in securely. I also think I’m going to use chrome flanges. I’m a bit concerned about using wooden dowels as I’ll be hanging wet clothes over the dowels…. what do you think about using white PVC pipe?
Also… could you please tell me how far these extend from the wall? Thank you!
Hey Pamela, thanks for the kind words.
We have not had any issues with the wooden dowels. They actually soak up the water on the clothes a bit. PVC would probably be ok if you painted it, but I personally like the look of wood a lot better.
The racks extend about 3-4 inches away from the wall.
Also, what is the distance between the two bars? Thanks!
They are approximately 2ft apart.